Using the ARENA Builder
We will now do a quick tour of a simple interface to edit ARENA scenes. We will see how to create a scene and add some content to it! 🏗️
Add a Scene
Head to the build page in a new tab: https://arenaxr.org/build/
If you never created a scene, it will look similar to this:
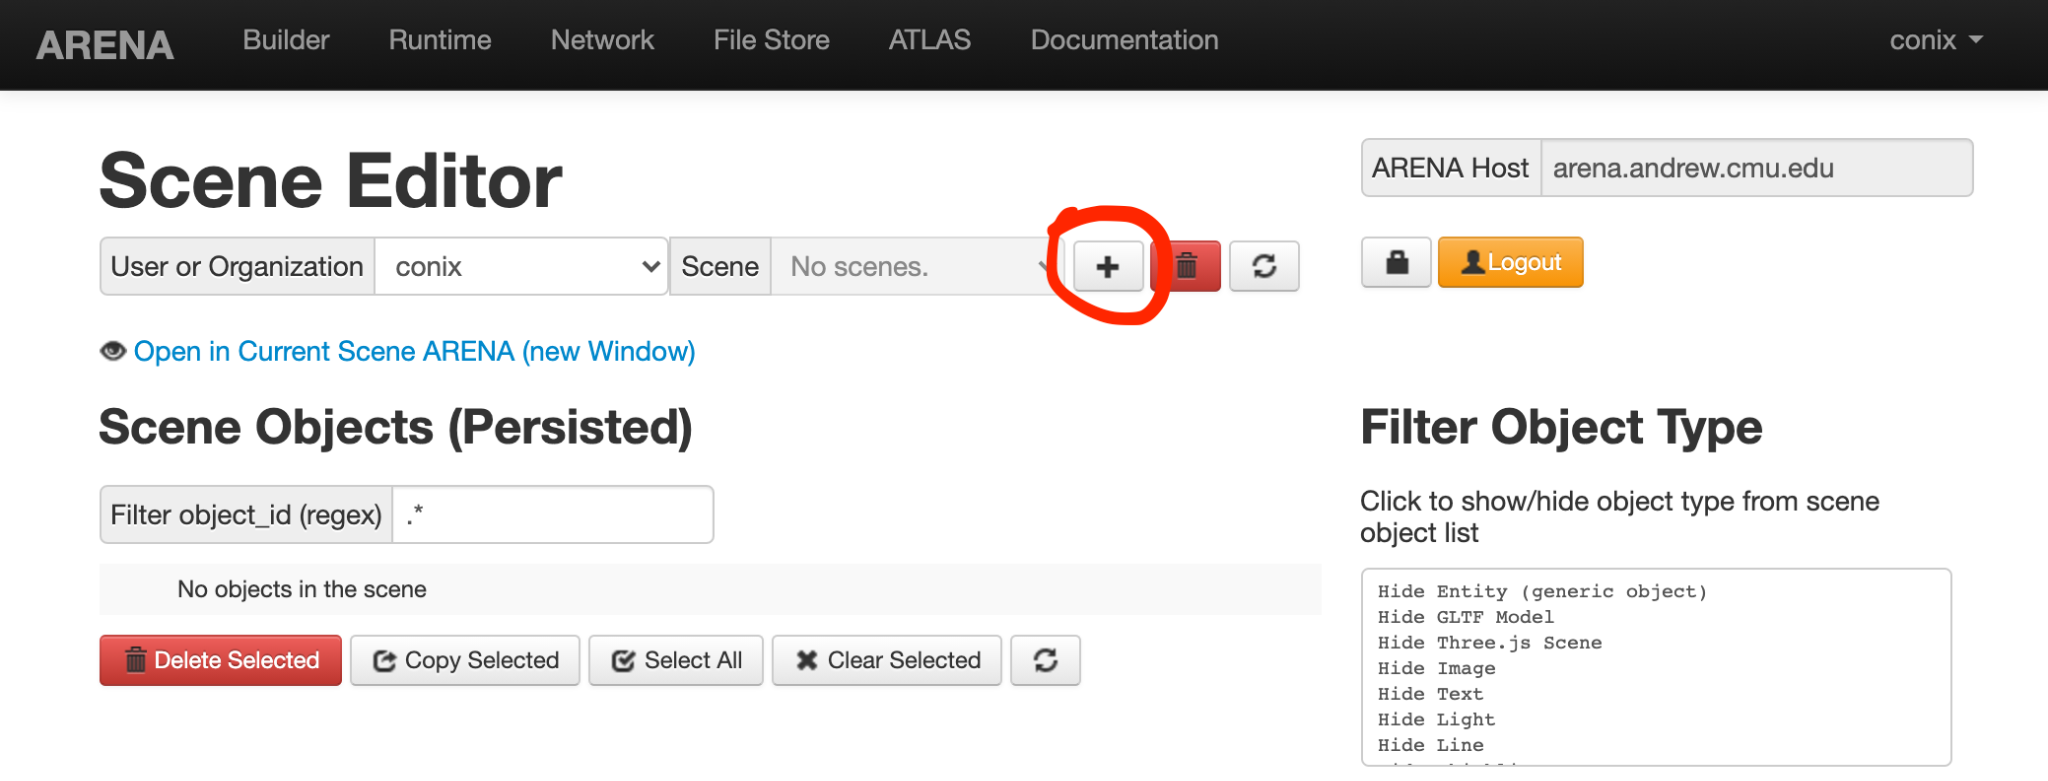
note
You will need to be signed-in to use the builder webpage. The conix in the upper right corner and in the [User or Organization] drop-down select is the username we used to login for this demo. Your username should appear there.
As indicated in the Scenes select, your user has no scenes. Let us add one by pressing the [+] button (highlighted with a circle in the figure above). This will pop a dialog to create the new scene as follows:
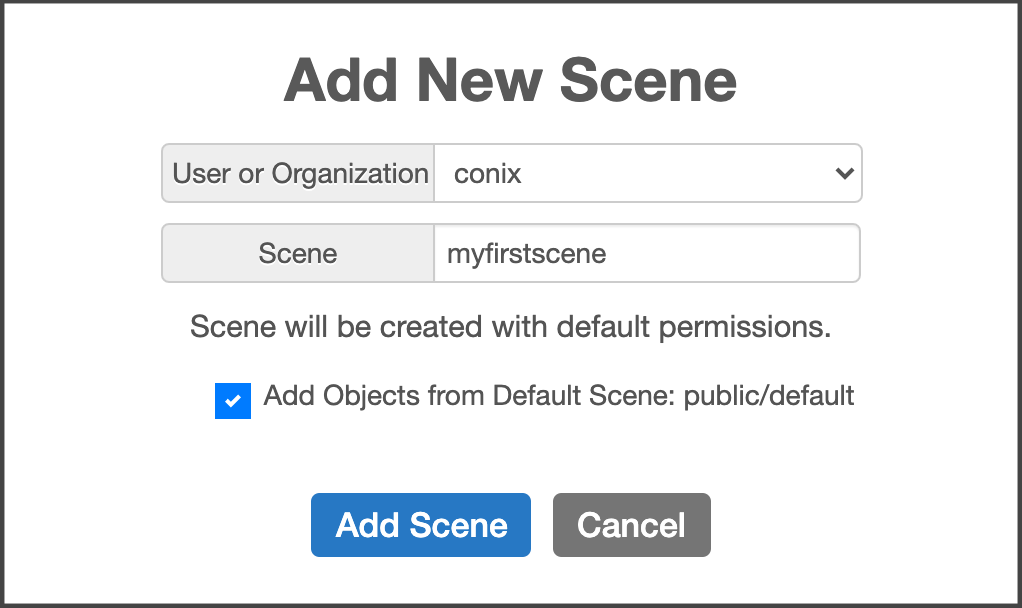
It is likely that you only have access to your User/Organization, so the first select will have only your username. Enter the name of the scene in the [Scene] input. You also have the choice to start your scene with some objects copied from the public/default scene. It is a good idea to do this, so leave it checked.
Once you are done, press the [Add Scene] button, which will prompt a ‘Create Object create published’ popup message in the corner. The popup will disappear in a second. Let us take this time to have a look at a few other sections of the build page shown below:
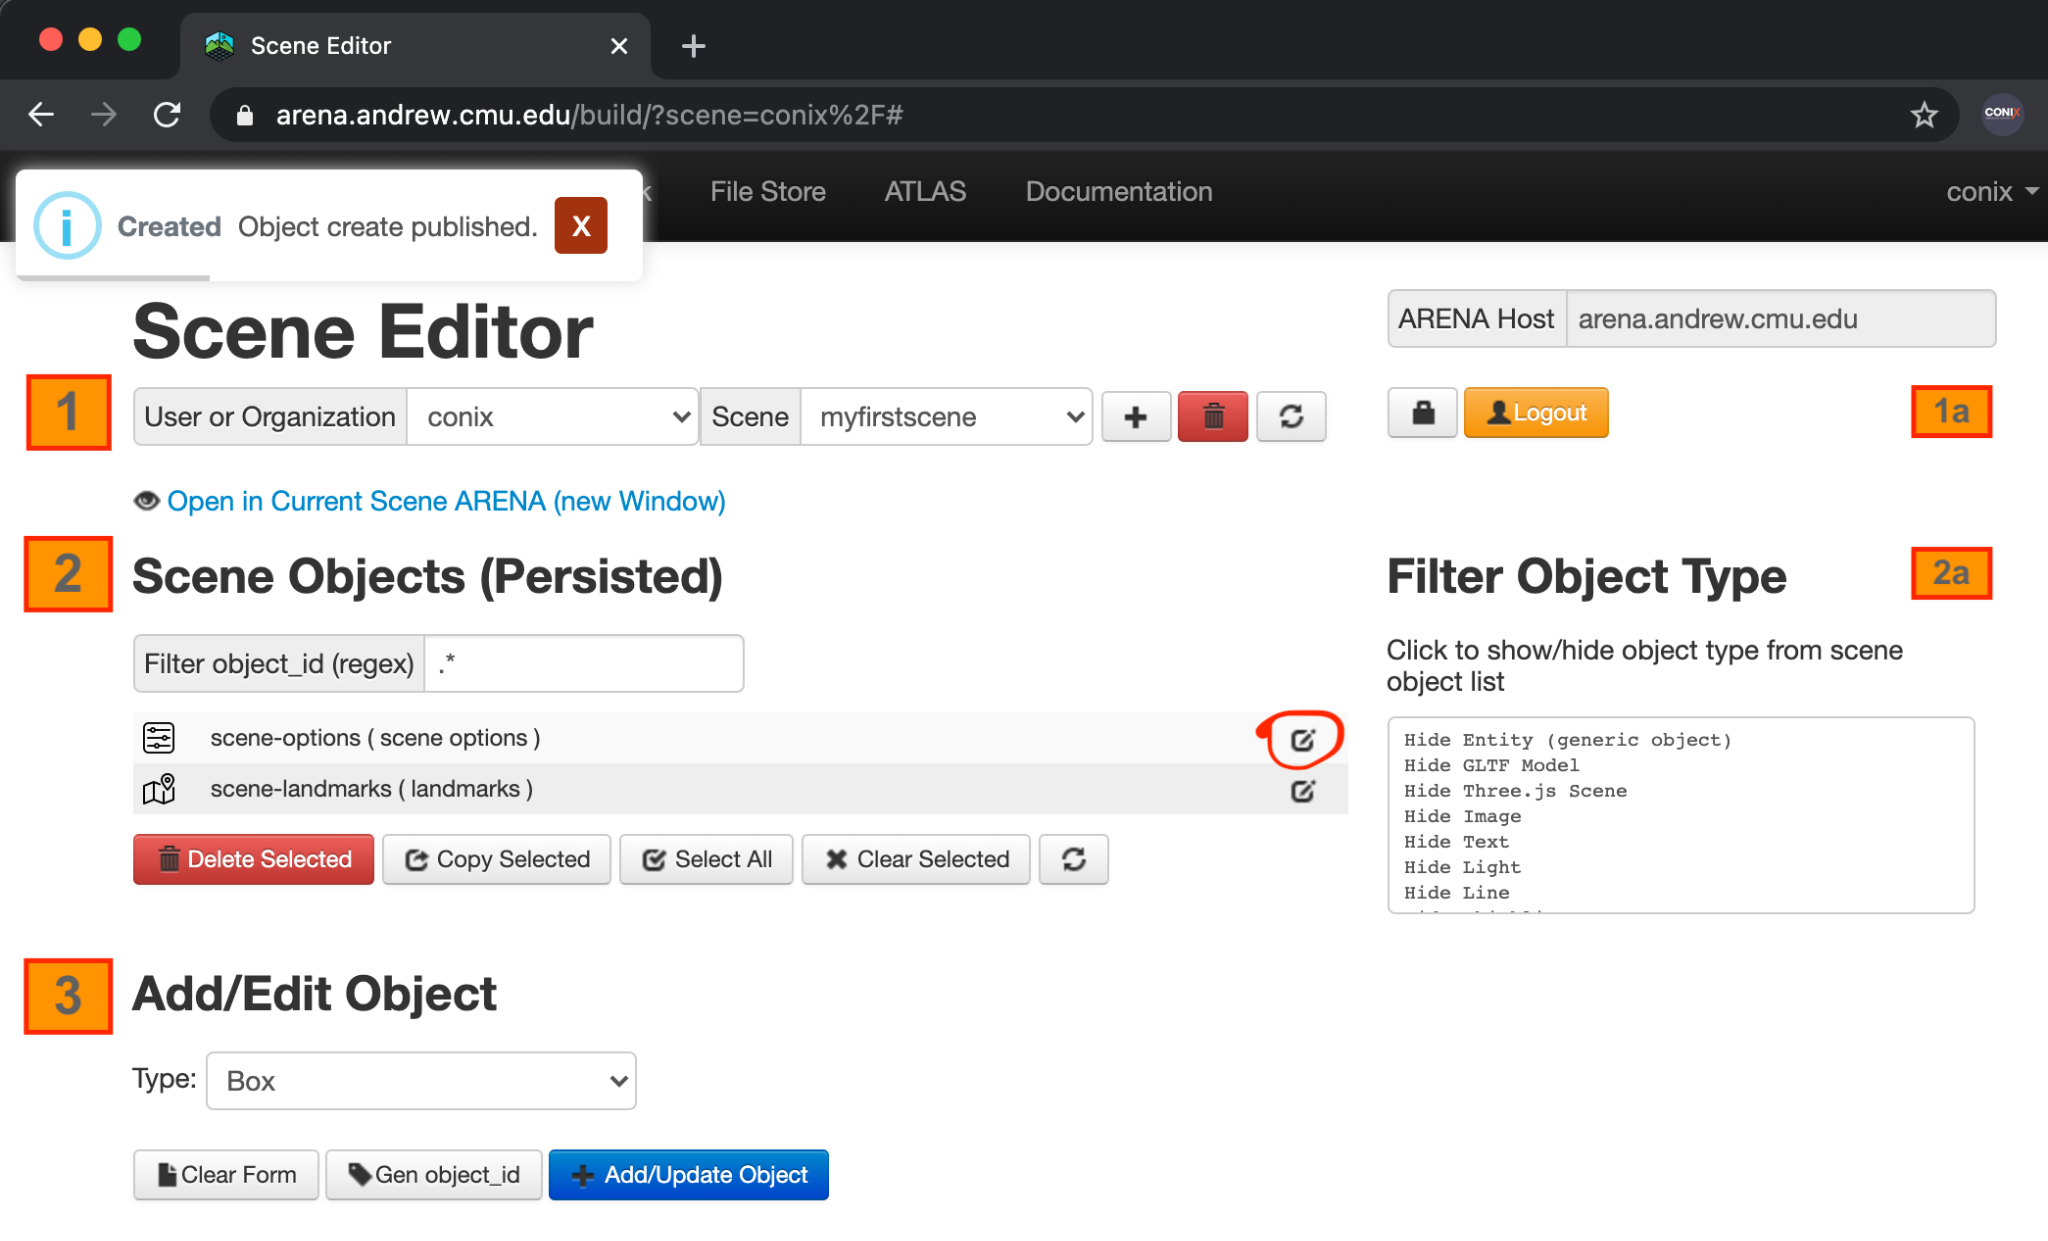
In the figure above, we numbered (orange boxes) the following sections of the page:
-
Scene selection: Select the scene you are editing here. As we have seen, we can also add scenes. Additionally, we can delete a scene and force a refresh of the scene list. This area also has a logout button, and a button that allows you to check your permissions.
-
Scene Objects: See a list of the objects currently persisted in the scene. At the bottom of the list there are buttons to delete, copy and select objects. To select a single object, click on its name (the line will become darker). You can press the object’s edit button (highlighted with a circle in the figure above) to edit its properties.This area also has a search bar that lets you filter the objects in the object list. Click on the list to toggle show/hide of object types.
-
Add/Edit Object: This section allows editing the properties of a new or an existing object (by pressing the edit button in the object list).
Let us see the Scene Objects and Add/Edit Objects sections in a little more detail now:
Editing Object Properties
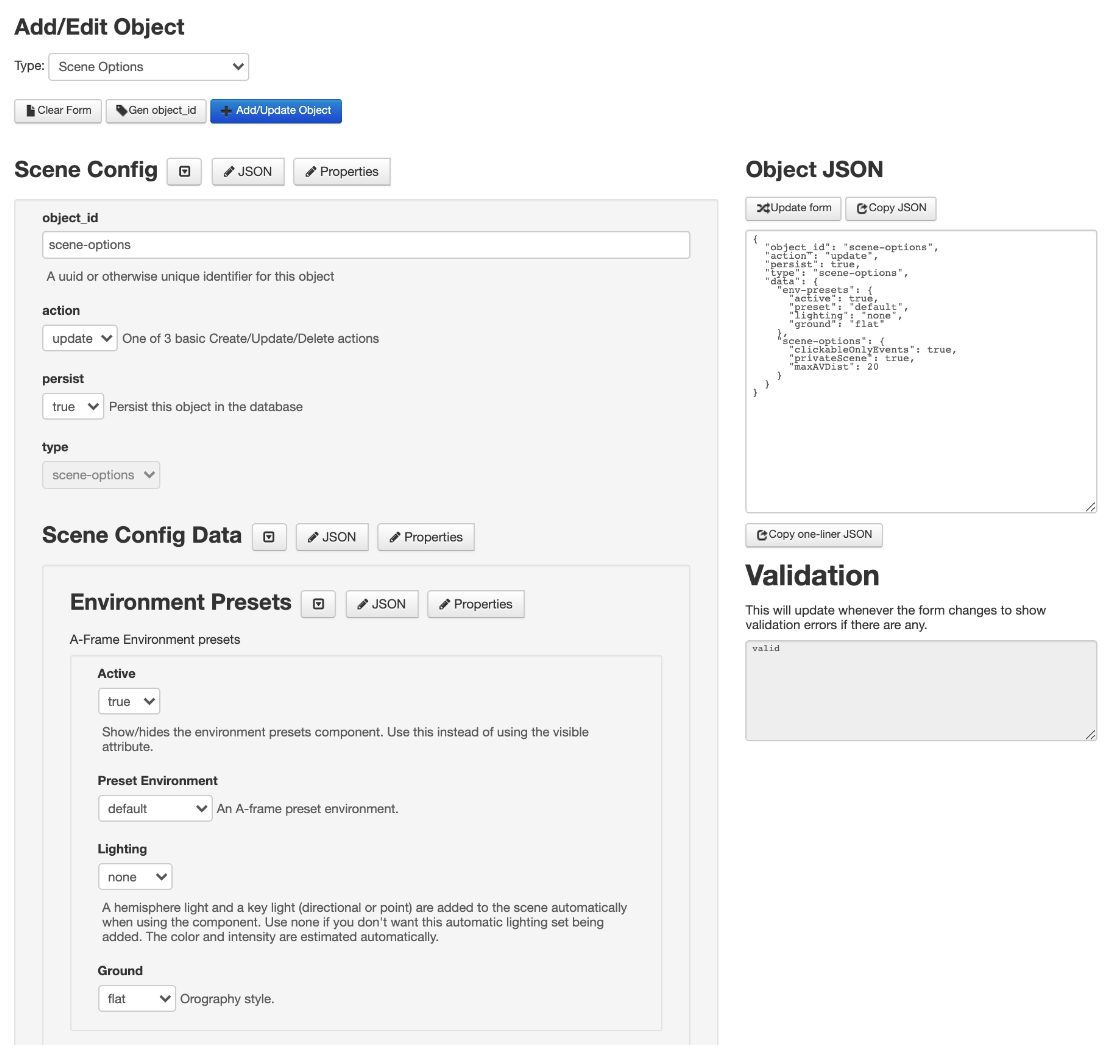
Press the [Edit] button of the scene options object:

You can now edit the object properties. When we are done editing the object, we can press the [+ Add/Update Object] button to trigger an update:
tip
Note the Object JSON panel on the right; this is a text representation of the object being edited in the form. All objects in the ARENA have a JSON representation. As you edit the form, the JSON will be updated. You can also edit the JSON directly and use the [Update form] button to reflect those edits back to the form. The Validation below will output any validation error detected.
The first 4 properties of the form (object_id, action, persist, type) are common to all ARENA objects.
A scene options object allows setting options for a preset environment in the scene, set some scene options (such as audio range, publish behavior, or scene privacy) and define some renderer settings. The properties that appear on the form can be set with the [Properties] button.
Notice the 3 different sections of the scene options object:
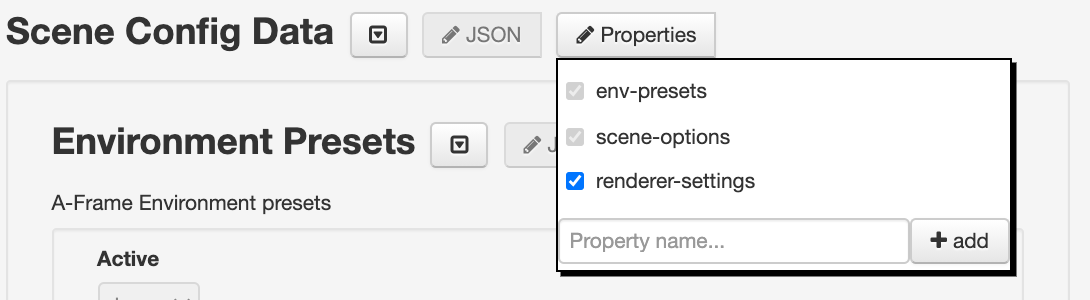
The checkboxes allow to hide/show those subsections of the top-level object (scene options). Note that each subsection has its own [Properties] button.
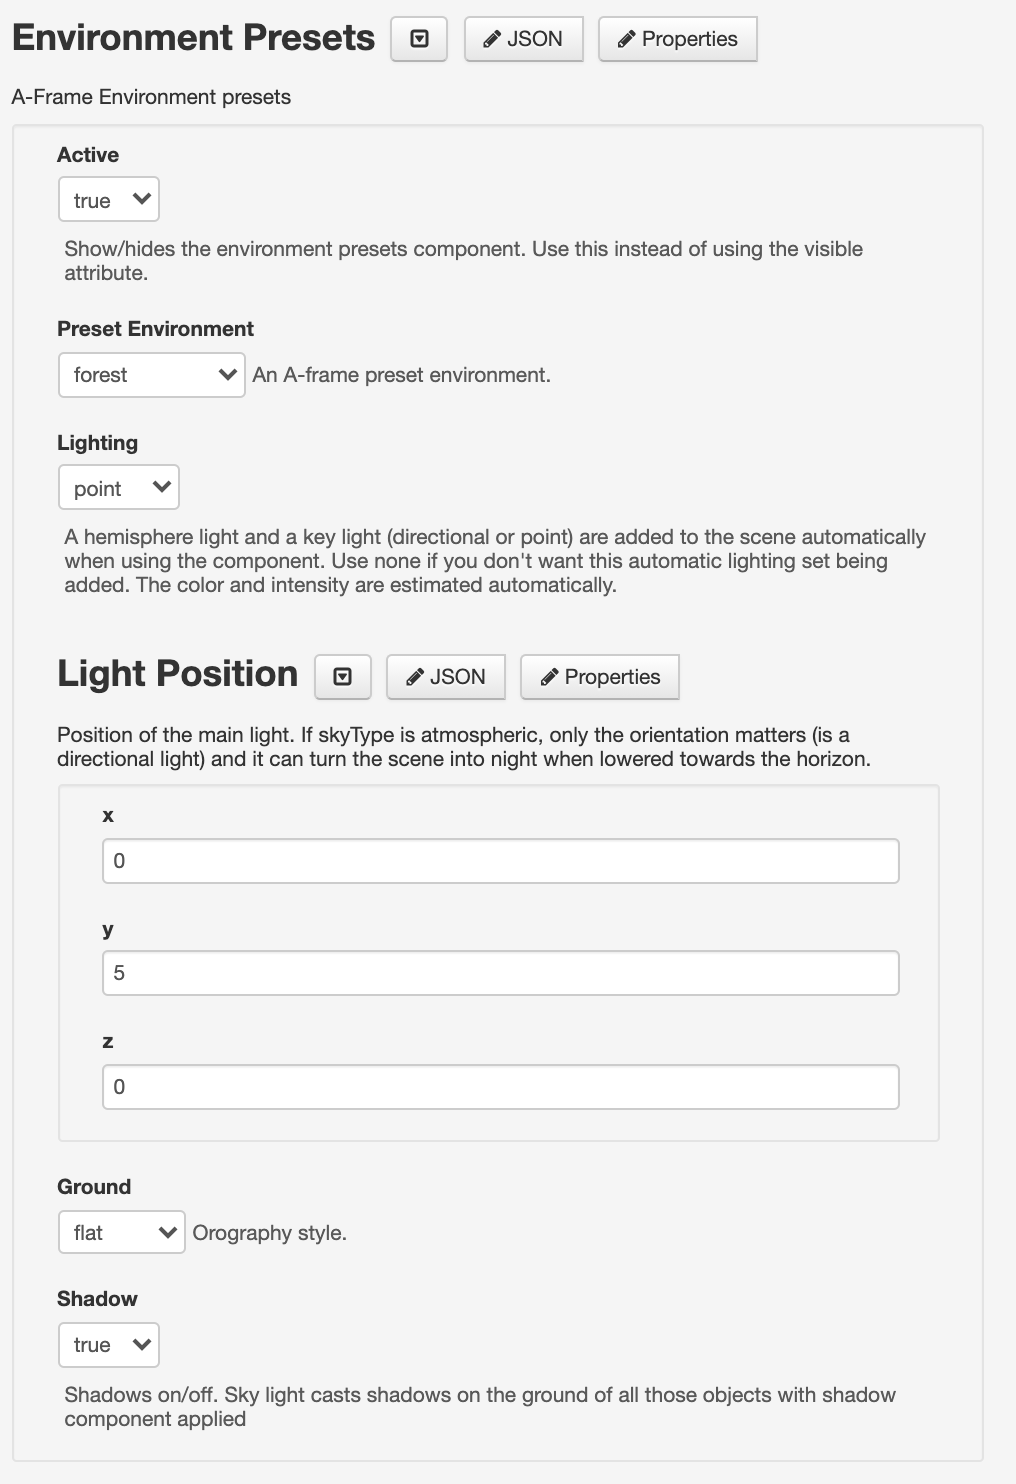
For example, the environment presets:

Later, we will add a nice model to our scene. To prepare the scene for it, try to set the environment preset to forest, add a point light to the scene at(x=0, y=5, z=0), and set shadows to true:
After making the edits, update the object by pressing the [+ Add/Update Object] button. You will have to reload the scene to have the new scene options applied.
Add new Objects
Let us try to add a new object to our scene. We will add a GLTF model of the Mammuthus primigenius (Blumbach). We only allow 3 different methods of storage currently: the ARENA File Store, CDN, and Dropbox, as follows.
- ARENA File Store Url:
store/users/wiselab/build/blumbach.glb - ARENA File Store CDN Url:
https://arena-cdn.conix.io/store/users/wiselab/build/blumbach.glb - Dropbox Url:
https://www.dropbox.com/s/pgytn552kzukm8f/blumbach.glb?dl=0
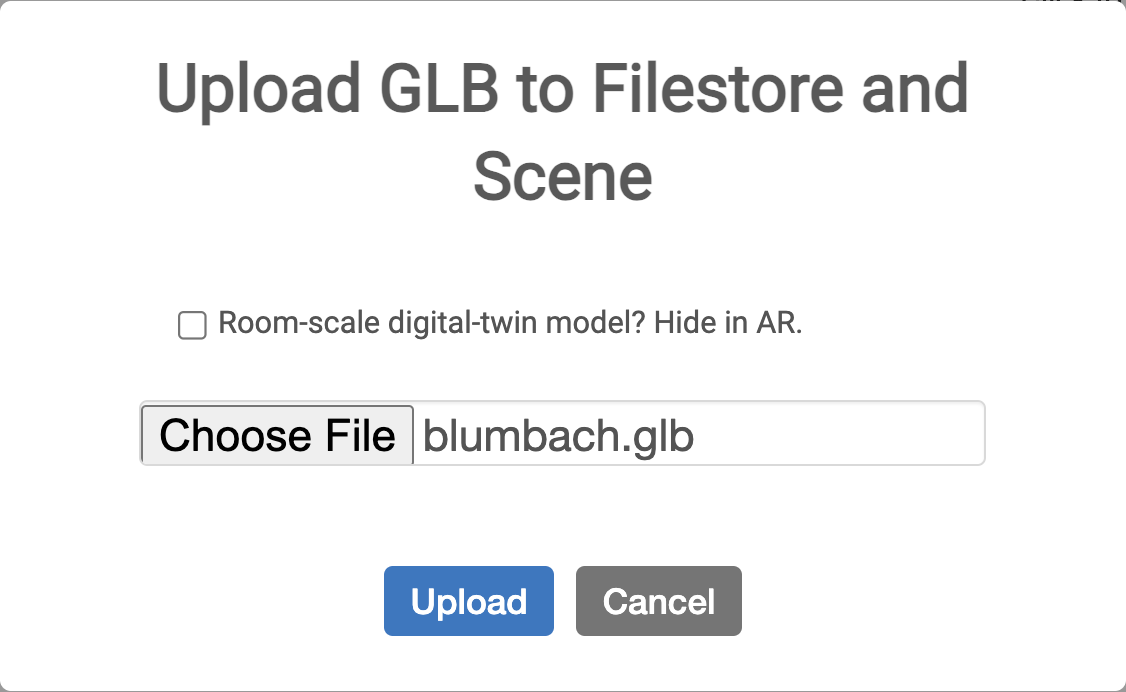
This example will highlight the ARENA File Store strategy. In order to use the model in the ARENA, we will upload a .glb copy and share it publicly using the ARENA File Store Url.
Start by selecting the GLTF model object type from the Type select at the top of the Add/Edit Object section:
There are multiple paths to upload files on the ARENA File Store and Dropbox, which you can review.
Currently we will use the simplest method, the [Upload Model to File Store and Scene] or
[ ![]() ↑ ].
Select the model and it will be uploaded for you automatically.
↑ ].
Select the model and it will be uploaded for you automatically.
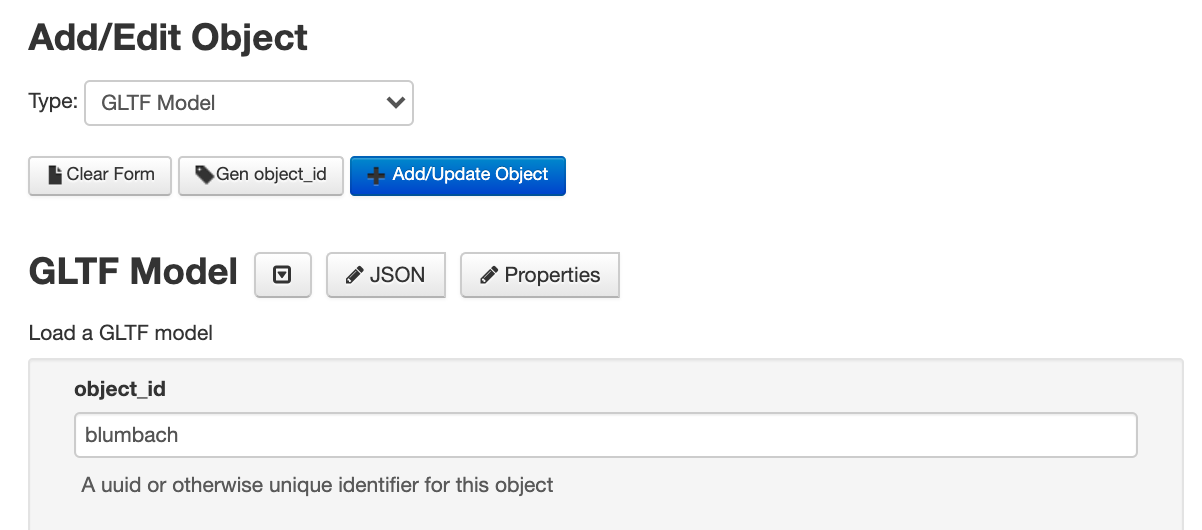
As you select the GLTF model, the form will change to the default properties for this object type. Let us edit the form and enter:
- object_id:
blumbach(any name that identifies the model will do) - action:
create(creating the object) - persist:
true(want to persist) - Url:
store/users/wiselab/build/blumbach.glb(auto-generated by the method above) - Position: 0, 1.7, -5, (x, y, z)
- Rotation: 0, 45, 0, (x, y, z)
- Scale: 1, 1, 1, (x, y, z)
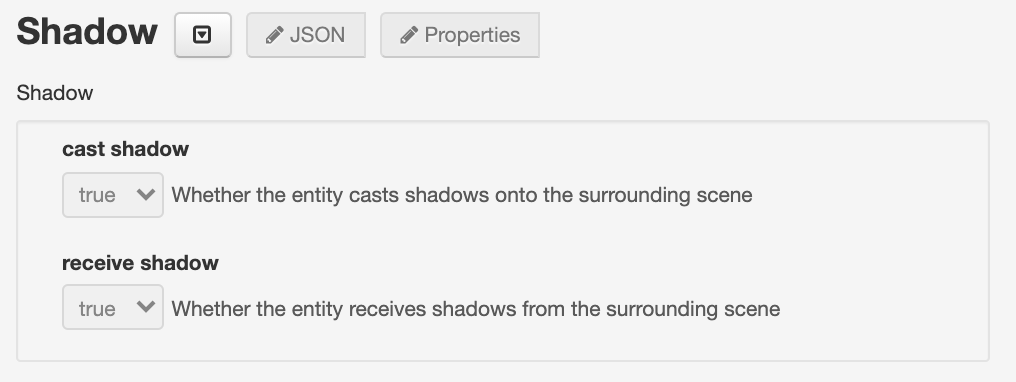
In order to have nice shadows from our model, add a shadow property to
the GLTF
model:
And enable both cast and receive shadows:
Update the object by pressing the [+ Add/Update Object] button.
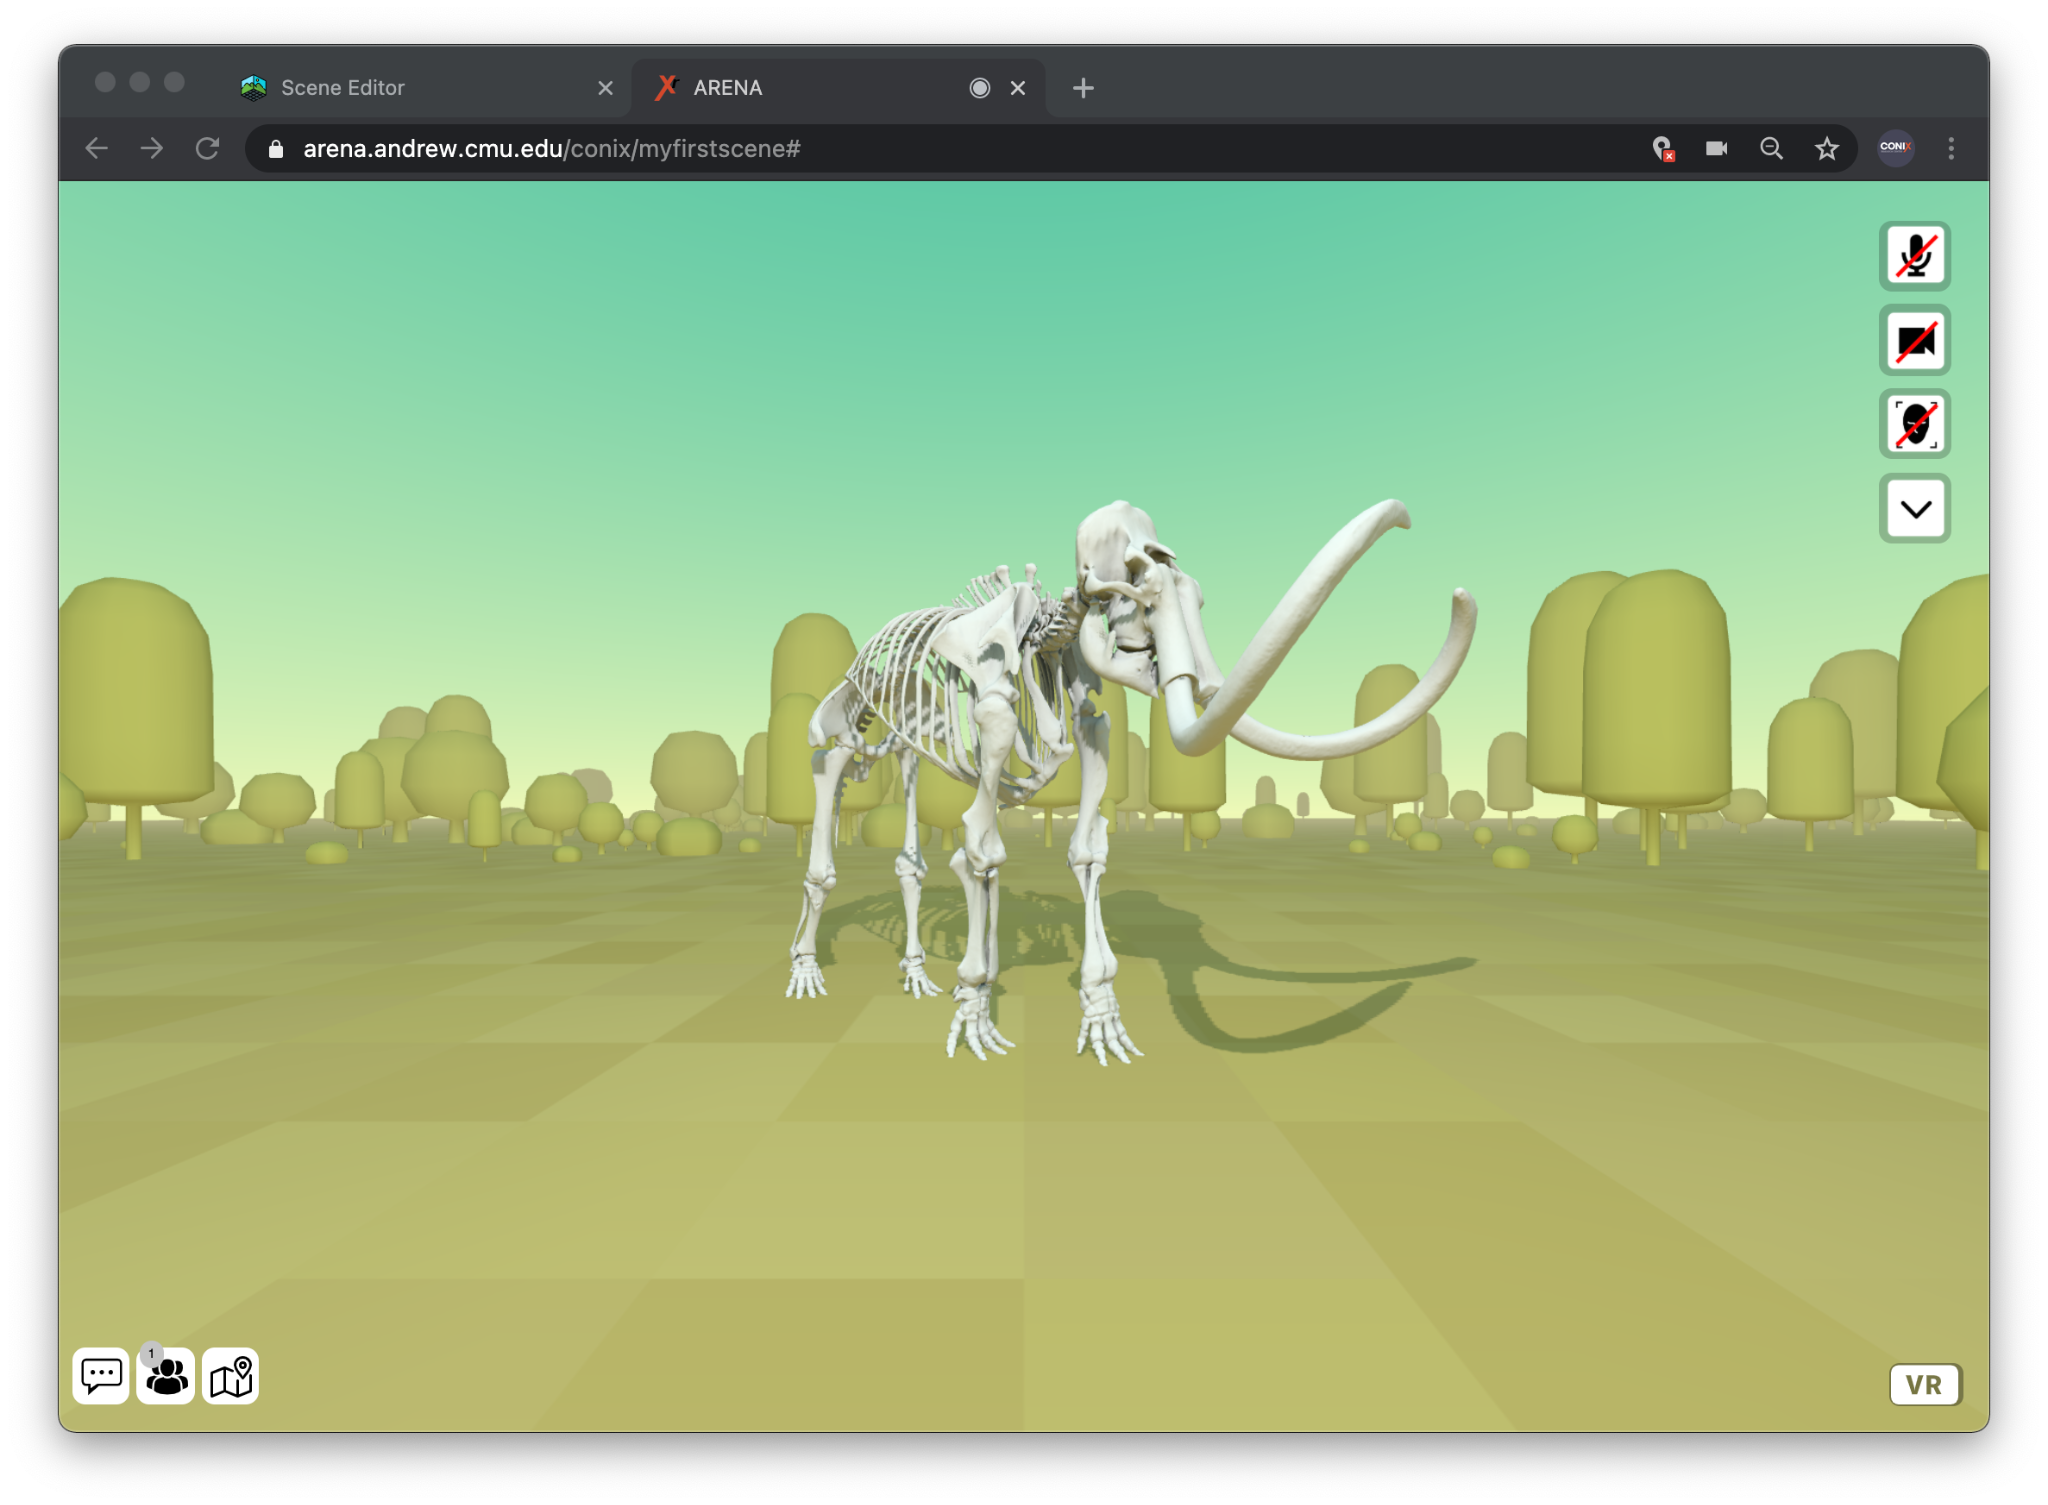
Now, if you open the scene in your browser by following the link at the top of the page:

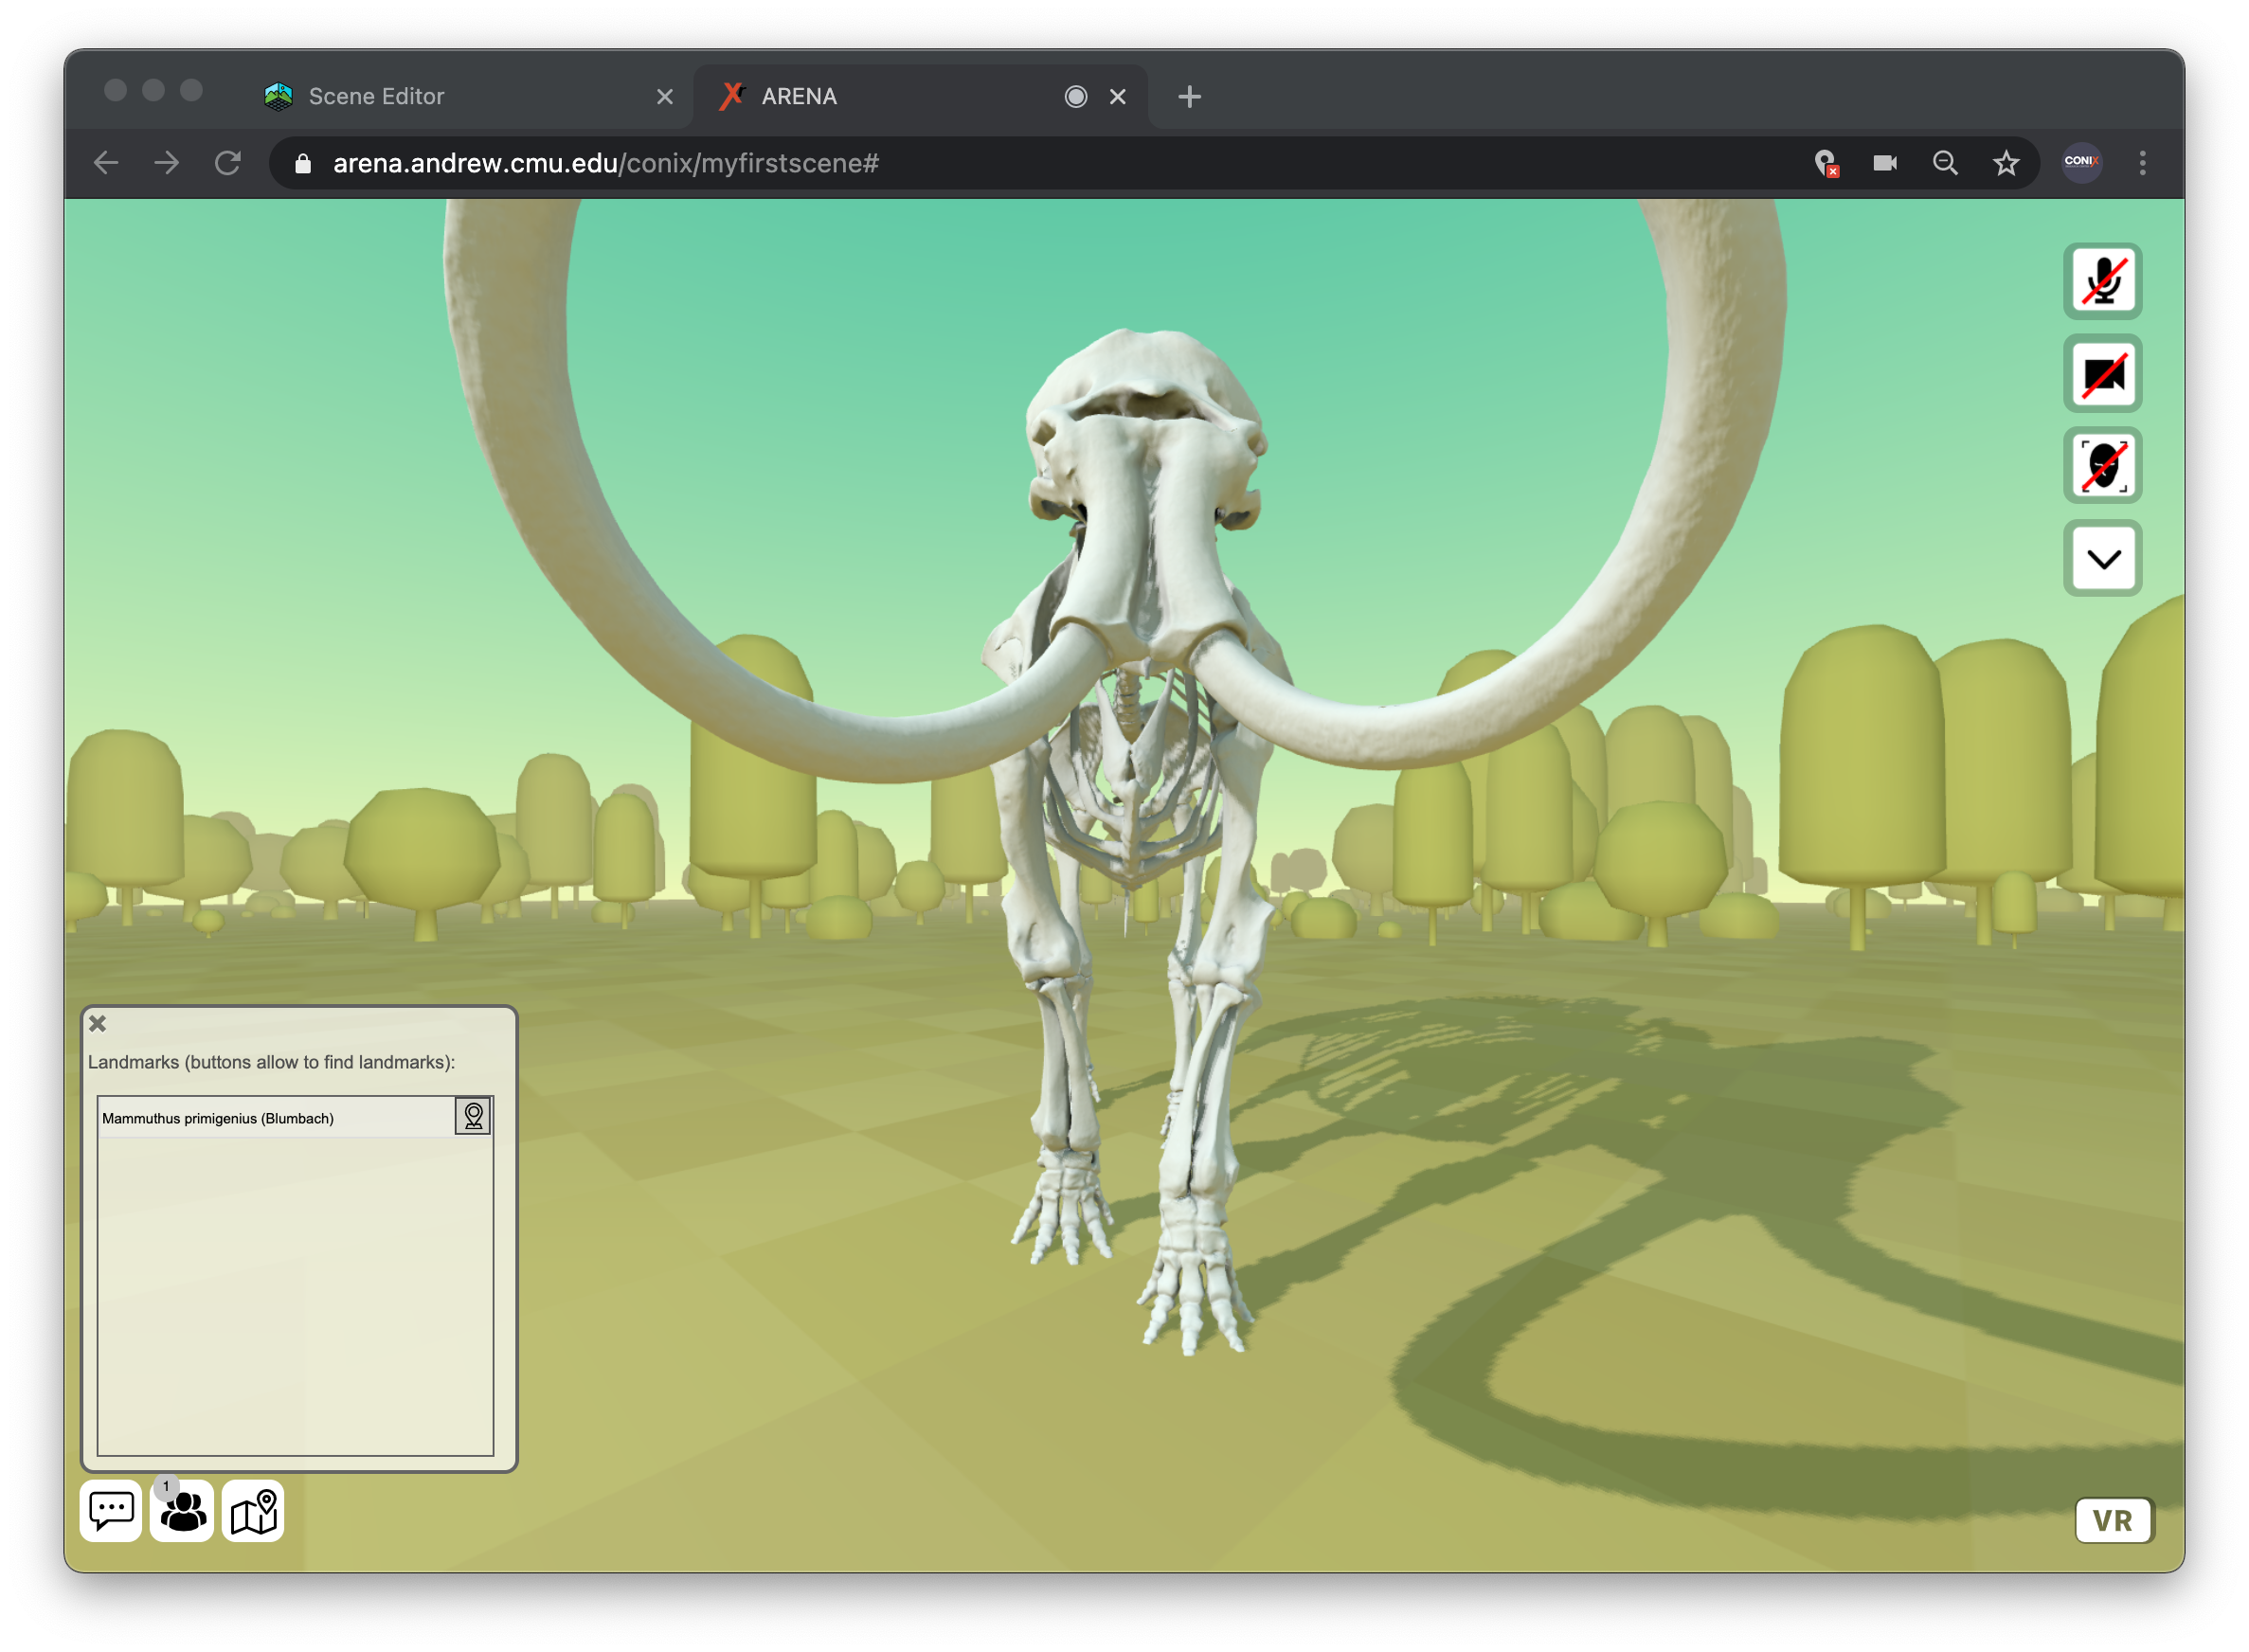
You should have a magnificent Mammuthus primigenius (Blumbach) in your scene!
tip
Other object types (3D objects, scene options, landmarks) can be added in a similar way.
Add Landmarks
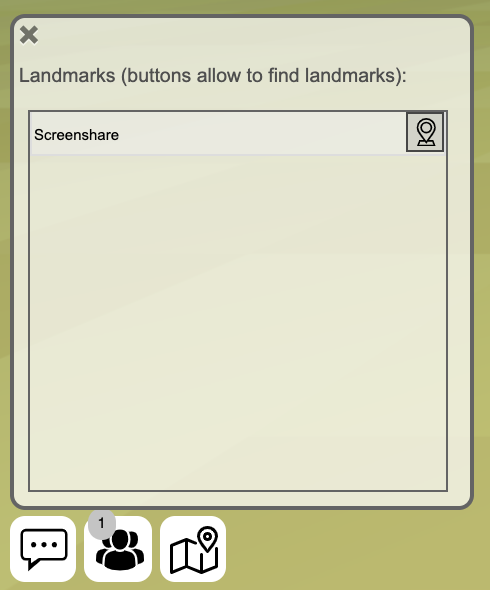
A list of Landmarks is shown from the button at the bottom left corner of the screen
[ ![]() ].
].
Landmarks allow you to jump to certain places of interest in a scene. If you copied the landmarks from scene/public, it is likely that you have a single landmark pointing to a Screenshare:
Let us add a landmark to the Mammuthus primigenius (Blumbach) model. This way, wherever we are in the scene, we can quickly jump to be near it. Start by selecting the existing Mammuthus object from the list.
Update the object by pressing the [+ Add/Update Object] button.
Under the GLTF Model Data section, click on the [Properties] button, and check/add
the Landmark property. Add the label “Mammuthus primigenius (Blumbach)”.
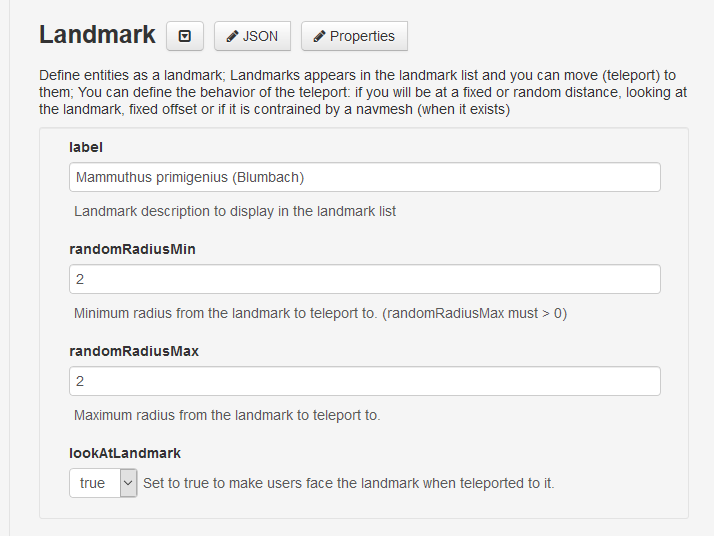
The landmarks list will automatically update once this property is added.
Now in the landmarks list and press the ‘Mammuthus primigenius (Blumbach)’ entry.
tip
You can control the distance and/or position you are placed from a landmark in the landmark properties either with a randomRadiusMin and randomRadiusMax,
or an offsetPosition. Otherwise, you may be placed in the middle of the object!
See your scene in Augmented Reality (AR)
In an AR device (e.g, an AR headset or a tablet or mobile phone with passthrough AR capabilities), you can press the [AR] button at the bottom left (the AR button is not visible in devices that are not AR capable, such as a desktop). It will initiate an AR session where the background environment is hidden when entering AR (this is the default setting, but might vary depending on the configuration of your scene).
Your scene’s origin will be placed relative to your device’s location in the real world when the AR session starts. Usually, you will want to anchor your scene in the real world. The following overview section has a quick AR example showing how to anchor a scene in the real world. Check our section on miXed Reality (XR) Experiences for details on this and other aspects of creating AR experiences in ARENA.
goal
Create an ARENA scene and add your scanned object to the scene! The animation may not trigger. You should trigger it with Python code (see the next section).
Icons made by Smashicons, Freepik from www.flaticon.com